Configuring domain name for Sentry self-hosted
Part 2 of the Sentry self-hosted series

Entrepreneurial Developer
This blog post is the second post in the Sentry self-hosted series. In this post, we will set up a domain name for your Sentry self-hosted instance. This post will assume you already went over the previous post that explains the setup process and requirements for Sentry.
To proceed with this tutorial, you will need a domain name and access to change its DNS configuration. If you are not familiar with this, you can check with your domain registrar's FAQs or help center. The most popular registrar (at least from my side of the world) is GoDaddy, and this link will provide you with the details on how to do so. For those who are you using CloudFlare, this is the link to help you accomplish that
After you've set up Sentry and logged in with the user you've created, you will be presented with a configuration screen like the one below (this might be different depending on the version you installed, as of the time of writing the below is what it shows)
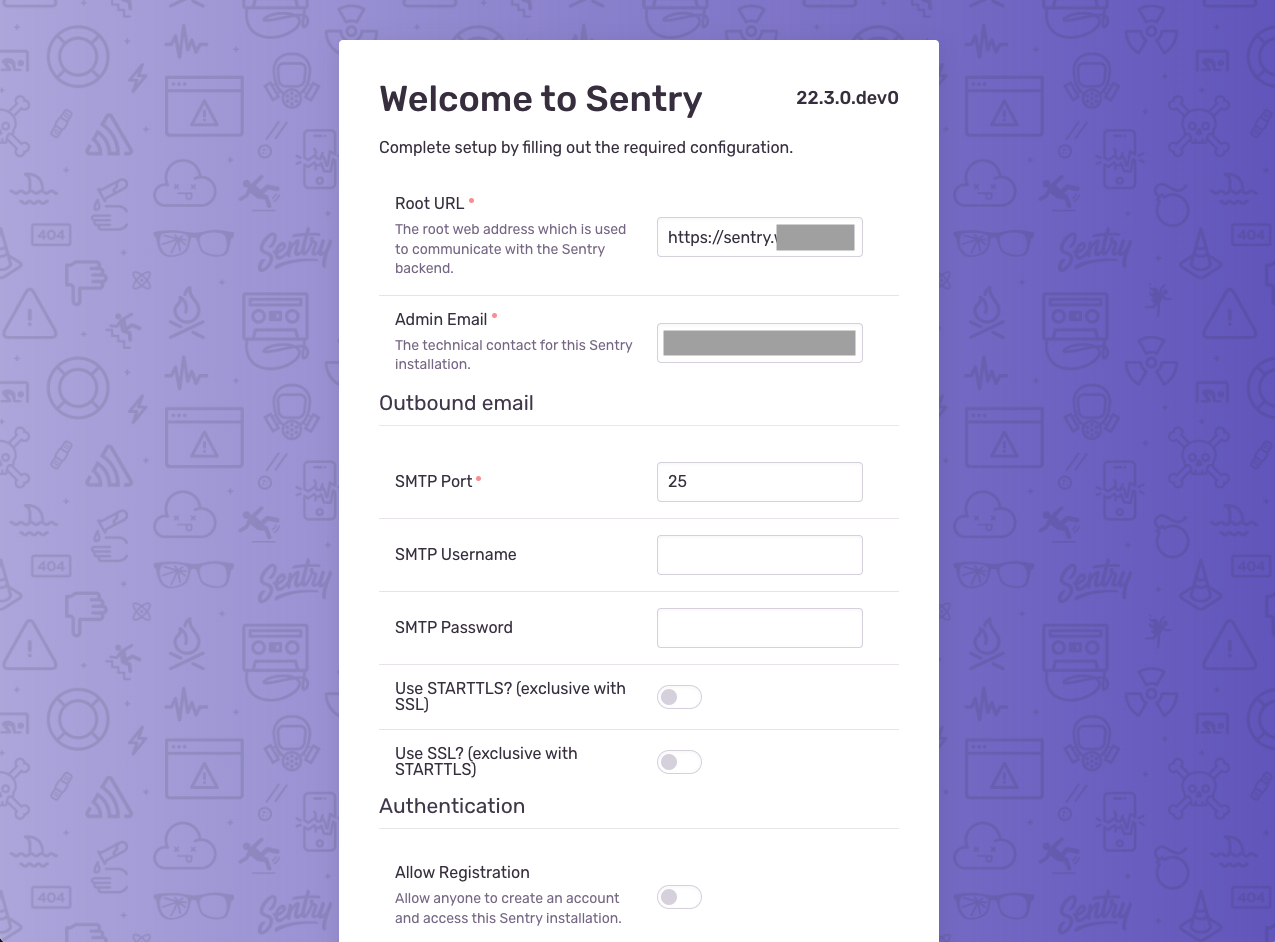
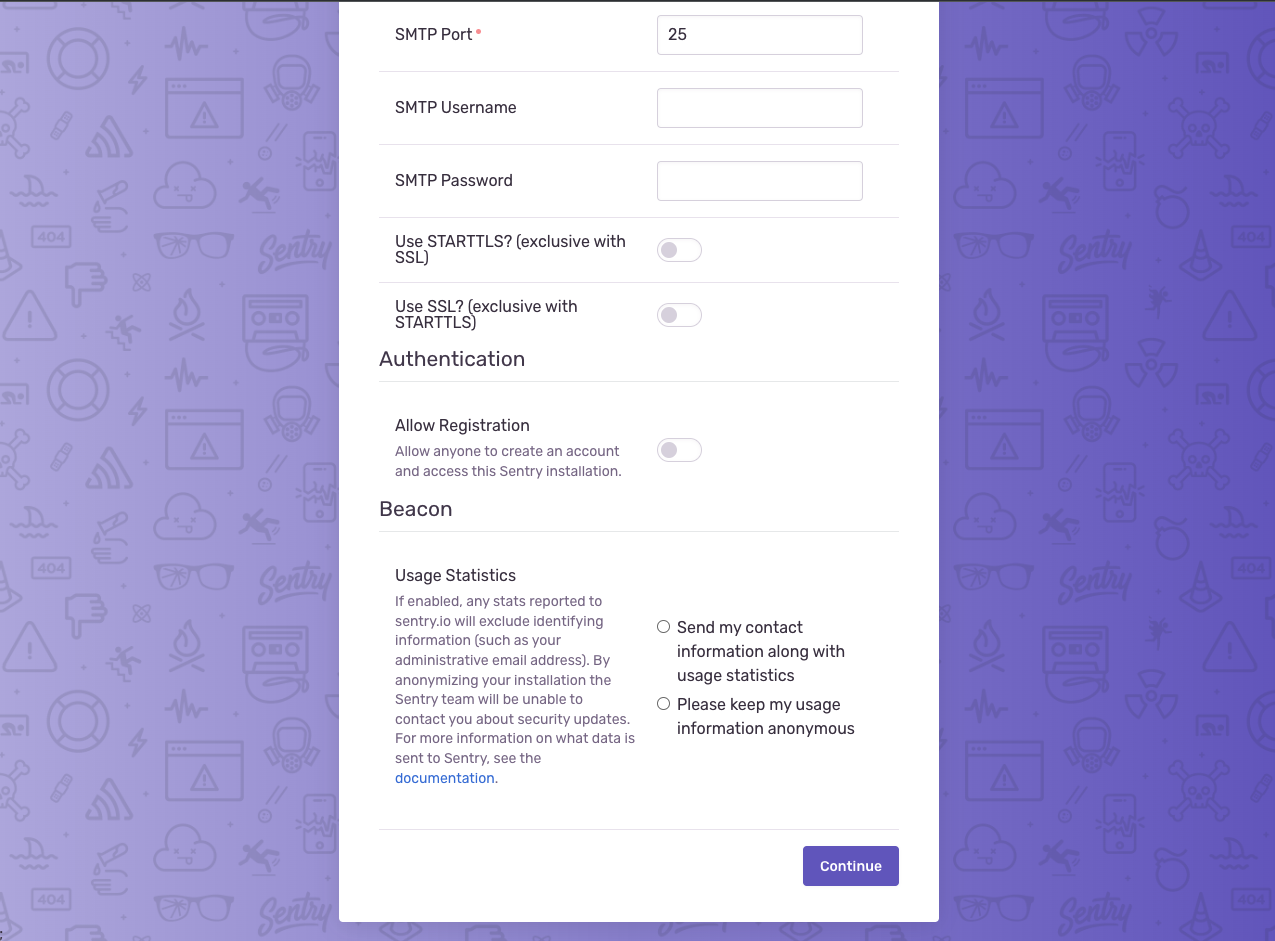
Setup screen
Root URL
The first input (Root URL) is the URL address of the current installation. Sentry uses this to prefix links and any redirection URLs to the following instance.
You should enter the URL that your instance will reside behind in this input field. So let us say your domain is xyz.com. You will enter xyz.com into that input field. It's a good practice to use a subdomain in this case. Something like sentry.xyz.com
Admin email
The second input is the admin email for this installation. This email is used as a technical contact for this Sentry installation.
You should add the email that you want to receive technical information on.
Outbound email
This section is dedicated to setting up the email server that will be used for sending email notifications from your Sentry self-hosted installation.
Self-hosted Sentry ships with a built-in outgoing SMTP server powered by exim4. The default configuration is set to use this server. If you're not very familiar with what this is, I suggest leaving this section as is. I'll be covering how to set up your email configuration in the next part of this series.
Authentication
This section has one toggle. If you have this toggle turned on, it will allow people to signup for an account on your self-hosted Sentry. If you're using this for personal reasons or work-related reasons, most probably you want this option turned off.
Beacon
This section is about sending information (usage statistics and security information) to Sentry about this installation. This is totally up to you, in the end, you are getting software for free, the least you can do is help out Sentry with anonymous usage statistics.
DNS setup
As previously mentioned, to be able to accomplish setting up the domain. You will need access to the domain DNS configuration page of your registrar provider.
Head to the DNS configuration page and check for the Add record button.
Type
It will prompt you to select the type. You will need to choose the A type (it should be selected by default).
Name
Then for the name field, this should be the same as the one you entered into the Sentry setup page after logging in. The one we discussed at the beginning of this article sentry.xyz.com.
IPv4
In the IPv4 field, you will enter the IP address of your server.
This way the registrar will know to forward any request with sentry.xyz.com domain to your server (using the IP address you provided).
DNS configuration takes up to 24 hours to propagate, but depending on your registrar this might take a few minutes. In some cases though, it takes more than that. So don't get frustrated if it doesn't work right away.
After the DNS propagation has gone through, you should be able to access your self-hosted Sentry installation using the domain name you chose.
Let me know if you have any questions or run into any problems in the comments.
Good luck!