Configuring mail for sentry self-hosted

Entrepreneurial Developer
This blog is the fourth post in the Sentry self-hosted series. We will set up the mail configuration for your Sentry self-hosted instance in this post. This post will assume you already went over the previous posts in the series to set up the Sentry instance and configure the DNS AND NGINX configuration.
There are two ways to configure mail on Sentry:
- Built-in mail server
- Third-party mail server
Built-in mail server
Sentry ships with a built-in outgoing SMTP server set up out of the box.
Self-hosted Sentry ships with a built-in outgoing SMTP server powered by exim4. The default configuration is set to use this server. All you need to do is to set a valid address for
mail.fromsetting in config.yml and the FQDN of your Sentry instance for SENTRY_MAIL_HOST in .env. Keep in mind that if you start sending too many emails to public addresses, your new server may get marked as a spammer and banned.
To enable the default mail server, you will need to update the config.yml file under path_to_installation/sentry/config.yml
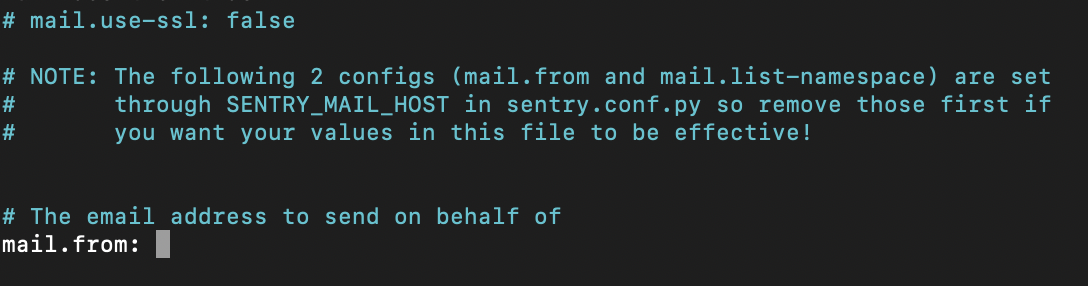
You will need to change the mail.from to the email from which you wish to receive emails. It could be something like sentry@yourdomain.com
After saving the changes to config.yaml, you must restart Sentry instance. You can do so with the following command in the root directory of your installation.
docker-compose restart
Third-party mail server
If you prefer to use a third-party service for sending emails, you can also do that. There are a lot of services that you can use; here are a few:
...
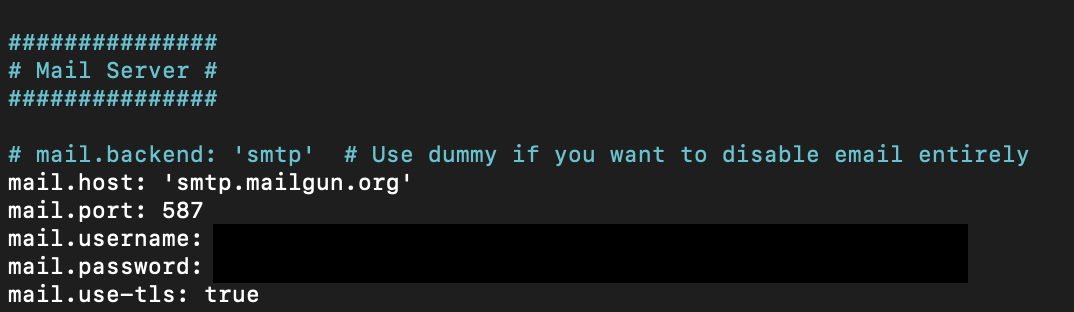
After signup up to an account, you would need the following information:
- SMTP host: this is a URL to the mail server host
- SMTP port: the port number
- SMTP username
- SMTP password
After retrieving the following information, you will need to update the config.yaml file with the above information.
After saving the changes to config.yaml, you must restart Sentry instance. You can do so with the following command in the root directory of your installation.
docker-composer restart
Conclusion
After updating the config.yaml file and initiating a restart. You can go into the sentry instance and send a test email in the settings
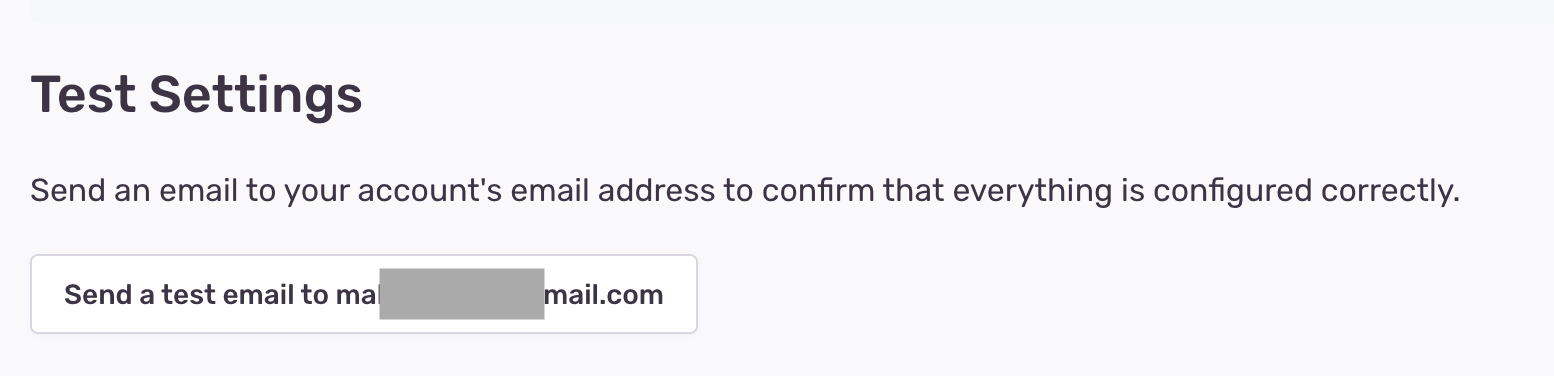
If you send a test mail and do not receive it, check your spam folder as it might have been marked as spam. If the email was not being sent for other reasons, like misconfiguration, Sentry would display a message with the error. If it fails with no message, you will need to put on your debugging hat and check the logs for more details.
If you have any questions or need any help, don't hesitate to DM me or ask your question in the comments.
Good luck!


